¶ About MQTT
MQTT today is an important part of the Internet of things, the service of outer complex security functions, architecture design belongs to the data forwarding servers at the same time, for example, an MQTT server, can solve different types of two sets of data exchange system, through subscription and transceiver interface design, it will only responsible for both ends to an exchange of data.
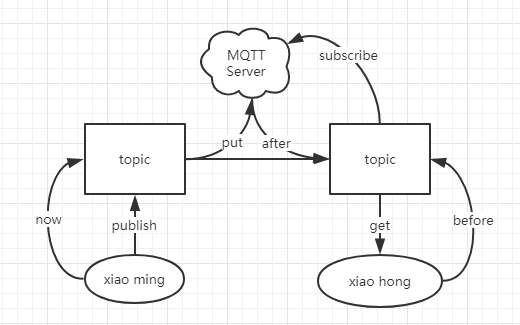
MQTT server mode of transmission can be thought of as everyone through their internal engagement after entering a public chat room, if you want to communicate with others, you can create a chat room (push), you can also add other people chat room (subscription), server regardless of how to communicate between you, it will only help you to the chat room set up and free exchange of information between you can, also have completed the transfer.
¶ For example
Xiao Ming want to send a message to the little red, so xiao Ming can create a topic (topic) of the chat room for sending (publish), then the little red to join (subscribe) this topic (topic) of the chat room, so she could get the xiao Ming’s information, the old version of the MQTT chat room is public, between each other is free to join others' topic, also is the others can receive xiaoming, privately, but now the MQTT server allows you to define permissions (config), Let xiao Ming’s topic only xiao hong can join.

Code between under this architecture, we are the client code, also do not need to write the server receives the program to another, as long as the two sides agree on the data of the interface agreement is ok, because the communication between the too transparent, so the security so far are too dependent on the surface of certification, will be back to authority and to improve the communication control.
¶ Prepare the MQTT server
Use a common MQTT server. If you do not have a public server, click here to enter The communication cat shares the MQTT server online client.Note that the ports of the WS and TCP servers are not the same, so you need to change the server port when you connect
You can also test out the MQTT service directly online, subscribing to your own topic messages and sending your own.
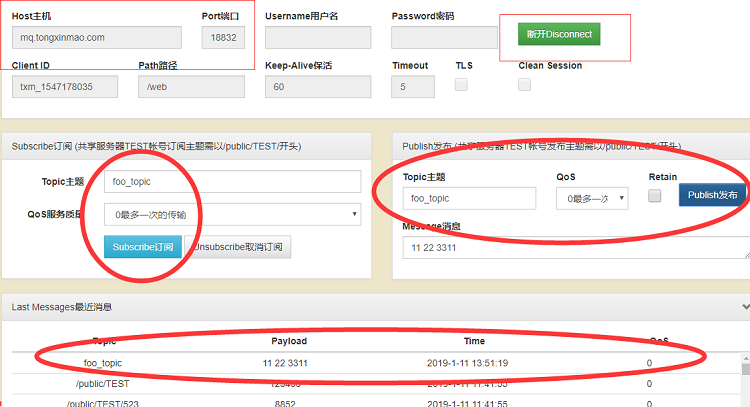
If you don’t want to use the Internet’s own MQTT server, you can use the local mosquitto Windows server environment pack, Just unzip and write out the mosquitos, and the config file is the mosquito.conf
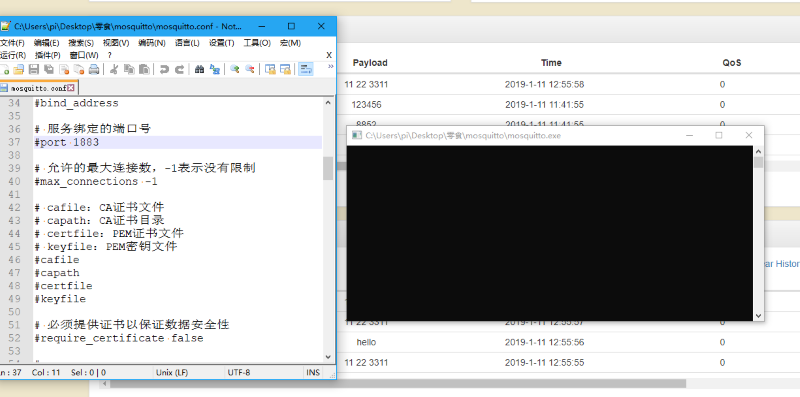
It won’t show any data after running normally, otherwise it will report an error and flash back, so don’t worry about whether it is working or not, if you need to confirm whether it is working properly, you can follow the following tutorial to try.
¶ MQTT on BPI:bit
According to the previous tutorial: 2 WiFI wireless connection and entering wireless mode, this tutorial confirms that the board has a networking configuration and that MQTT service can be started when the network is ready
Now prepare the following Python code, server_mqtt.py
import wifi
wifi.start()
server_ip = "mq.tongxinmao.com" # 在线公共的 MQTT 服务器
client_id = "umqtt_client" # 客户端 ID ,随意定义,用来标识自己发出的数据。

import time

from umqtt.robust import MQTTClient

try:
    # see https://github.com/micropython/micropython-lib/blob/master/umqtt.simple/umqtt/simple.py
    c = MQTTClient(client_id, server_ip, 18830) # 配置连接,这个是连通信猫的服务器配置,端口是 18830,一般默认的是 1883

    c.DEBUG = True # 输出 Debug 信息

    def sub_cb(topic, msg):
        print((topic, msg))
        c.publish(topic, msg) # 无论收到什么订阅的信息都以同样的主题和数据传回。

    c.set_callback(sub_cb) # 把向远端订阅(subscribe)的数据接收回调处理。

    if not c.connect(clean_session=False):
        c.subscribe(b"foo_topic") # 订阅一个 foo_topic 的主题(topic)

    c.publish(b"foo_topic", b"hello") # 向  foo_topic 的主题(topic)发送 hello 字符串。

    while 1:
        # 让芯片运行慢一点,便于观察现象。
        time.sleep(1)

        # 等待处理 MQTT 的数据
        if c.check_msg() is not None:
            c.wait_msg()

        # 没数据可以处理的时候可以做点别的事情
        else:
            print('other operator')
finally:
c.disconnect() # 调试程序事重开服务,要记得收尾,否则将重启板子才可以继续。Hese are concrete examples of MQTT and should run as follows:
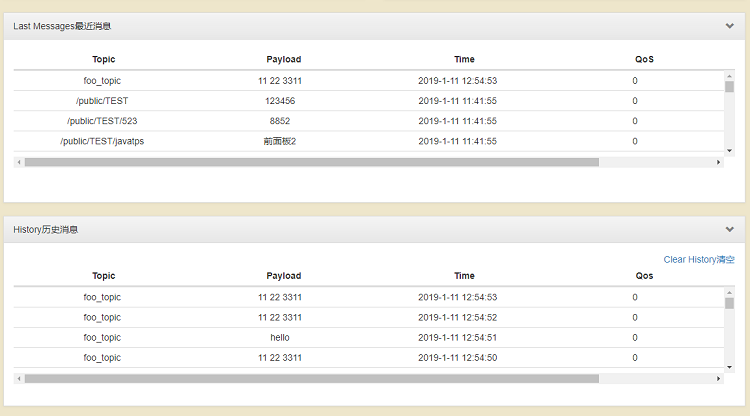
These are concrete examples of MQTT and should run as follows.The board will send a hello data to the person who subscribed to the foo_topic topic, which should be displayed to the user who subscribed to the topic on the web page.
The board has subscribed to the foo_topic topic, so it will receive 1’s previous hello data sent by itself, and then, according to the code, it will send the received data back intact, so at this time, the board will loop receive and send data on the foo_topic topic.
If we send data to the foo_topic on the web page, the board will receive the data and display it accordingly, such as 11, 22, 3311 shown in the figure. Notice that your new data will also participate in the output data of the loop mentioned in 2.
Try it for yourself.
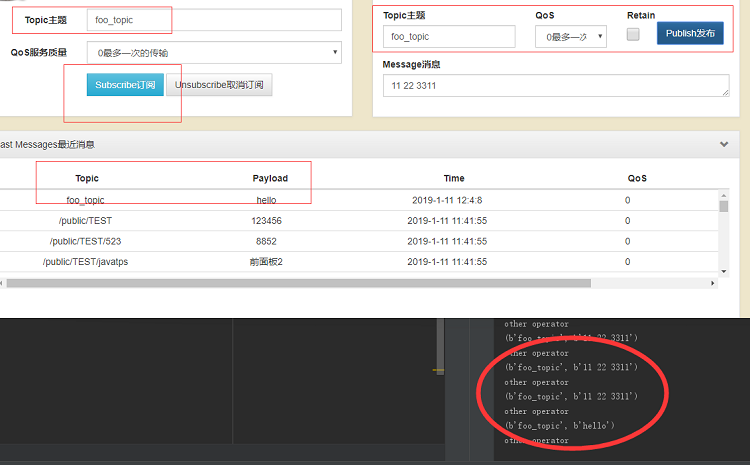
If it is a web page, it will display the data you defined in the board
