¶ Introduction
| More Infomation: Banana Pi BPI-CanMV-K230D-Zero |
¶ Specifications
¶ Development
¶ Prepare
-
Two USB to type-c cables, k230D board, SD card
¶ Install Image to SD under Windows
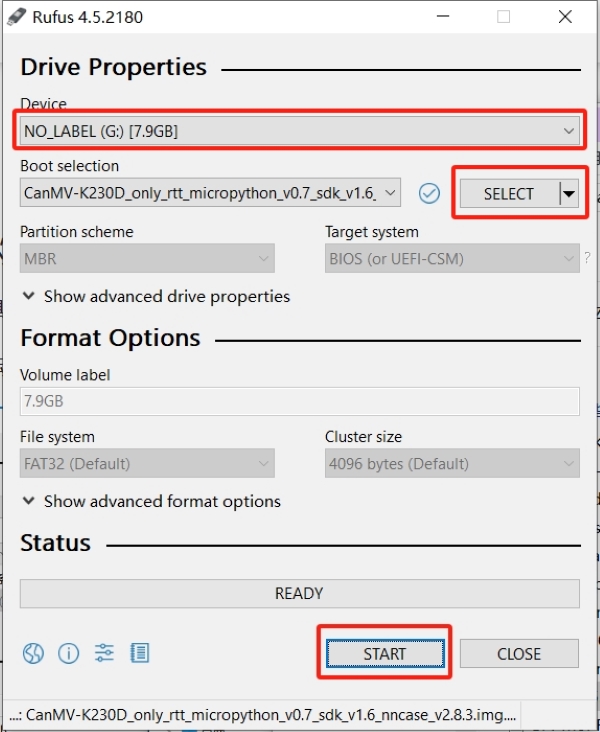
In Windows, you can use the Rufus tool to burn the TF card (Download address of the Rufus tool: http://rufus.ie/downloads/).
-
Insert the TF card into the PC, start the Rufus tool, click the "Select" button on the tool interface, and select the firmware to be burned.
-
Click the "Start" button to start burning. The burning process will be displayed with a progress bar, and the prompt "Ready" will be displayed after the burning is completed.

¶ Install Image to SD under Linux
Before inserting the TF card into the host, enter:
ls -l /dev/sd\*View the current storage device.
After inserting the TF card into the host, enter again:
ls -l /dev/sd\*View the storage device at this time, the newly added is the TF card device node.
Assuming /dev/sdc is the TF card device node, execute the following command to burn the TF card:
sudo dd if=sysimage-sdcard.img of=/dev/sdc bs=1M oflag=sync¶ User the device
After successfully burning the firmware, connect the development board to the computer, and you can see a virtual USB CanMV and a virtual serial port.
| You need to connect two USBs at the same time. If you do not see the corresponding virtual USB disk and virtual serial port, check whether they are connected correctly. |
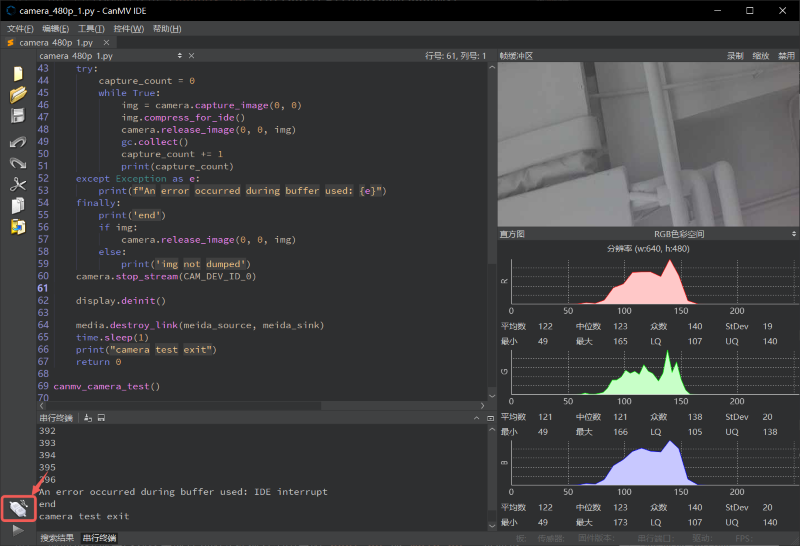
Open CanMV IDE (GitHub, developer community), or OpenMV IDE. (Please download the latest version of the software)
Connect K230D to the computer, click the connect button in the lower left corner of the interface, and wait for the connection to complete.

Write your own script, or open an existing one. Click Run.