¶ FAQ
¶ R4 Debugging Methods
Debugging methods include TTL serial line debugging and SSH debugging.
¶ TTL serial line debugging
Connection method:
R4 board — TTL to USB cable |
|
GND |
GND |
RX |
TX |
TX |
RX |
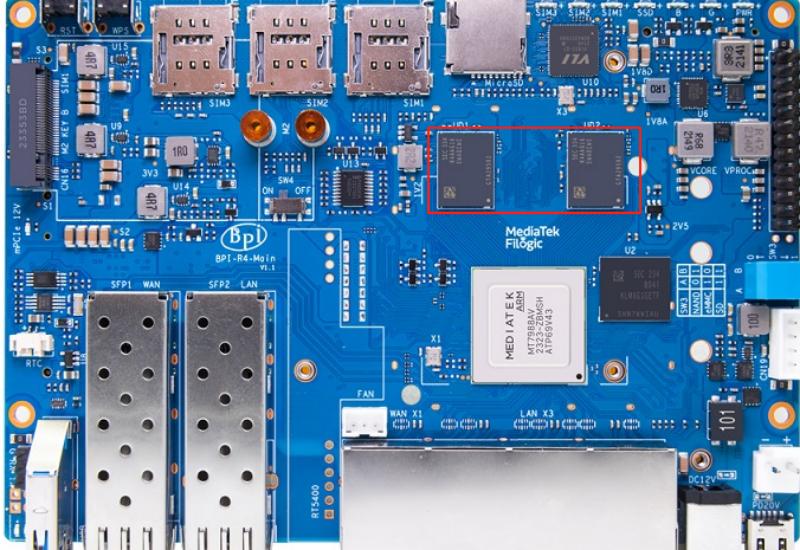
The board’s serial port location is shown in the figure below:
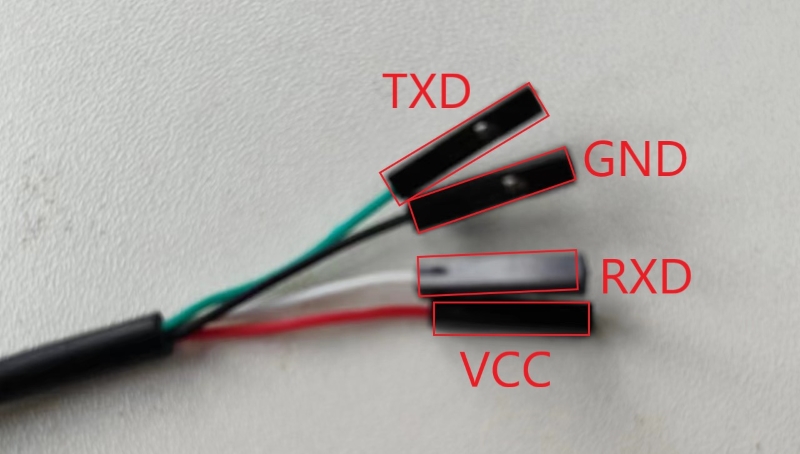
Common debugging cables on the market: TTL to USB cables (line sequence definition is shown in the figure below)
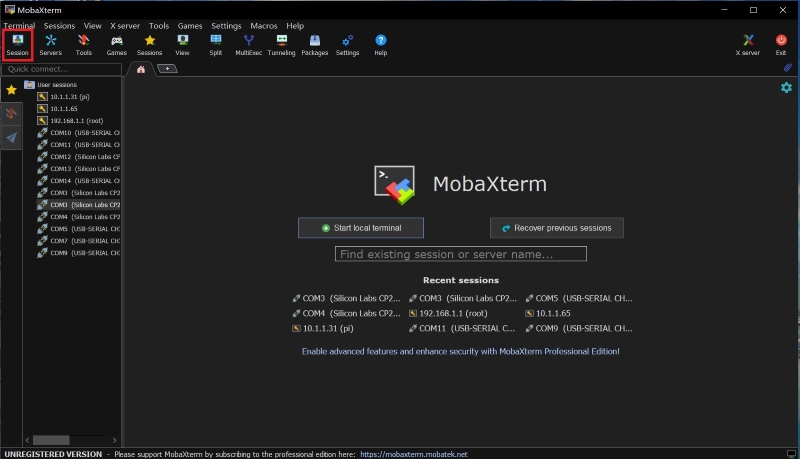
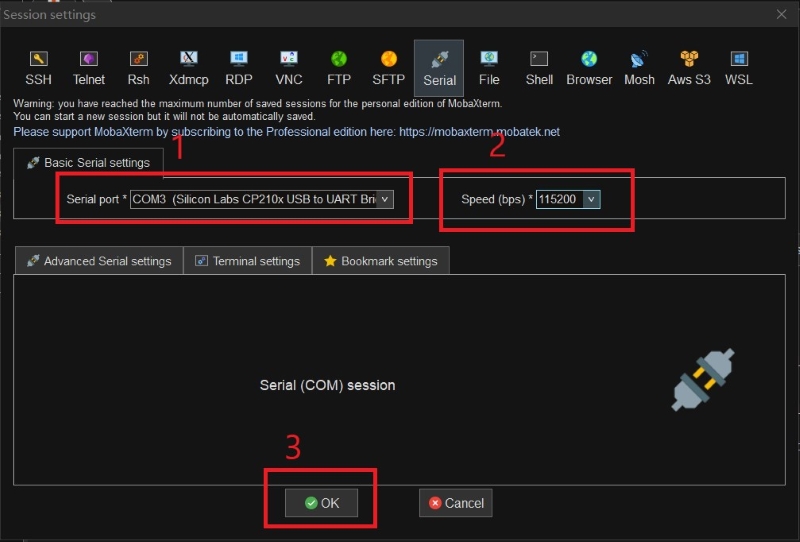
Open MobaXterm, then click on Session in the upper left corner and select Serial.
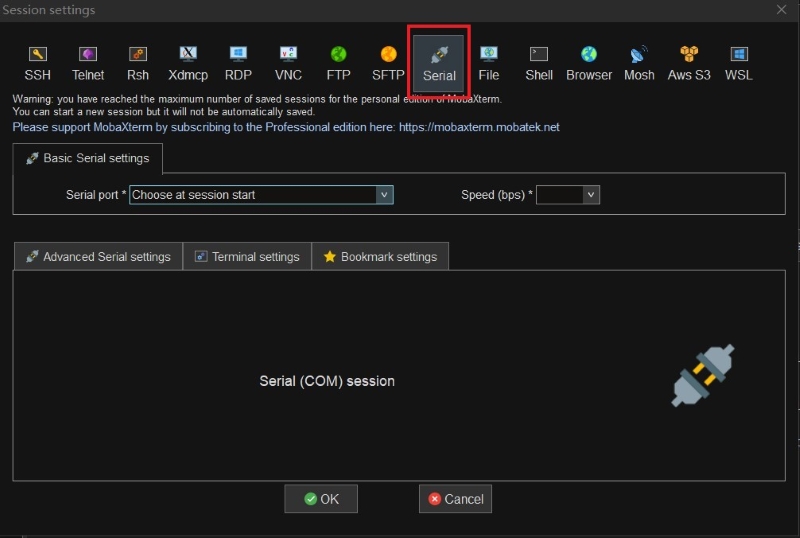
Select the port at the Serial port, select the baud rate at Speed (115200bps), and then click OK.
¶ SSH debugging
Connect the PC’s internet cable to a LAN port (one of the LAN ports circled in the image below).
Or connect to a WiFi on the R4 router.(Please see here for WiFi usage)
After obtaining the IP, use the ssh tool on the PC to enter the corresponding IP for connection debugging.
Open MobaXterm, then click on Session in the upper left corner and select SSH.
In Remote host, fill in the IP address of the device you want to connect to, check Specify username and fill in the login username, and fill in the port number.
(The default IP address is 192.168.1.1. You can also verify this by checking the IP address you obtained. If the IP address you obtained is 192.168.11.213, then the IP address of R4 is 192.168.11.1.)
(The default login username is root and the default port is 22.)
¶ No serial port output
If there is no output from the serial port, first debug the system using SSH as described in R4 Debugging Methods - SSH to see if the system boots normally. (If you can’t obtain an IP address or SSH connection fails, see The system cannot start or fails to start.)
-
Check that the computer has a working serial cable.
Check that the PC has the corresponding serial port driver.
-
Alternatively, replace the serial cable to determine if the hardware is faulty.
-
Check whether the TTL line is connected correctly and whether the baud rate is selected correctly.
-
Re-plug the TTL cable to check if it is caused by improper connection.
-
If you have checked the above steps and confirmed that the problem lies with the motherboard hardware, please contact us and provide the following information:
-
Describe how you caused this phenomenon.
-
Photo of the board powered on (the TTL line and DIP switch should be clearly visible), and photos of the MobaXterm software. You can also take a video.
-
¶ Determine the size of the DDR memory
| Before verification, please ensure that the image is used correctly. You can download the correct image from the official website to perform the verification. image Link |
-
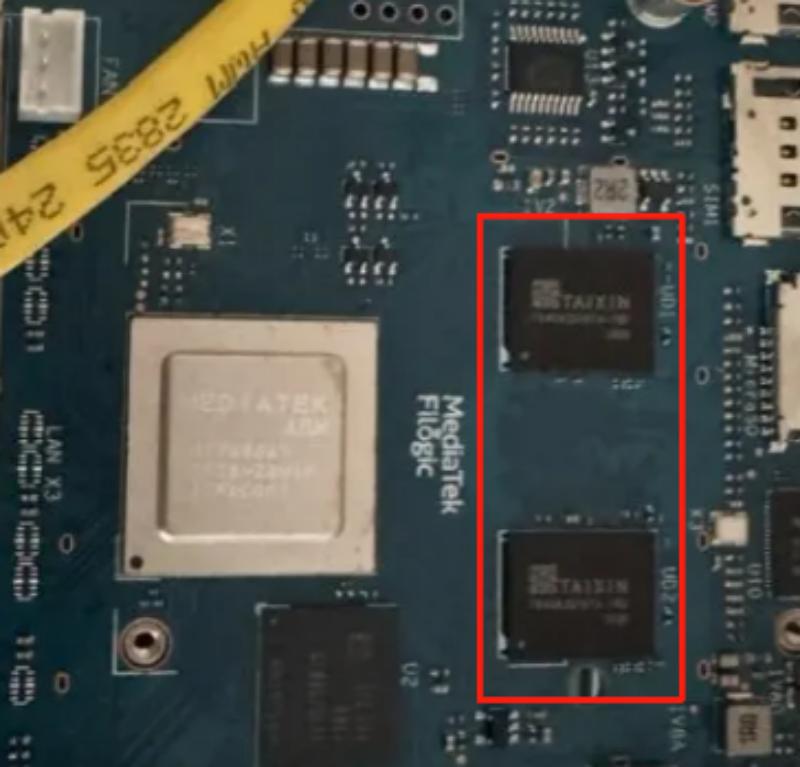
Judging by the model number of DDR
R4 4G board DDR: Samsung
R4 8G board DDR:TAIXIN
-
Use the command "cat /proc/meminfo" to query the size of DDR.
R4 4G board DDR
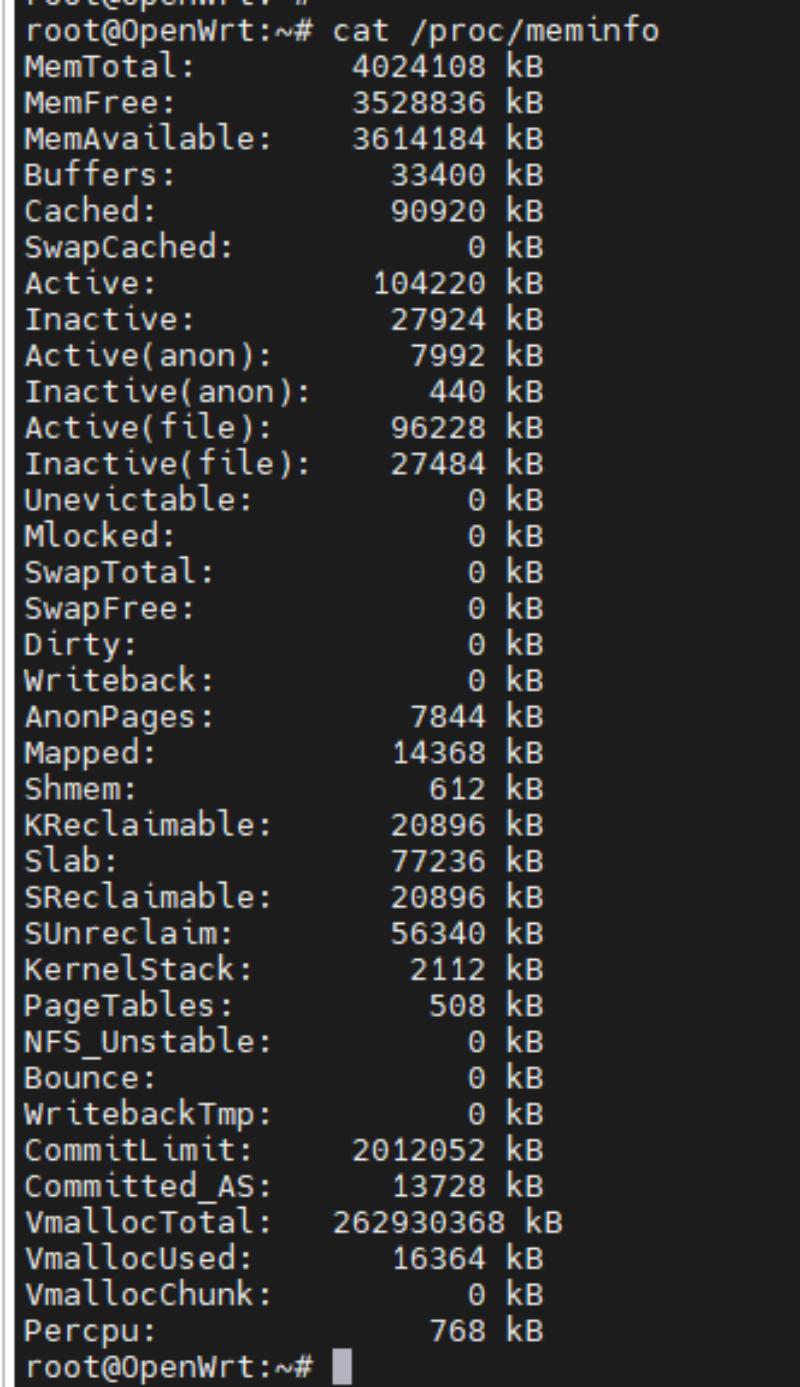
R4 8G board DDR

-
You can also check the DDR size on the main page of the web interface or use the command "free -h" to do the query.

¶ The system cannot start or fails to start
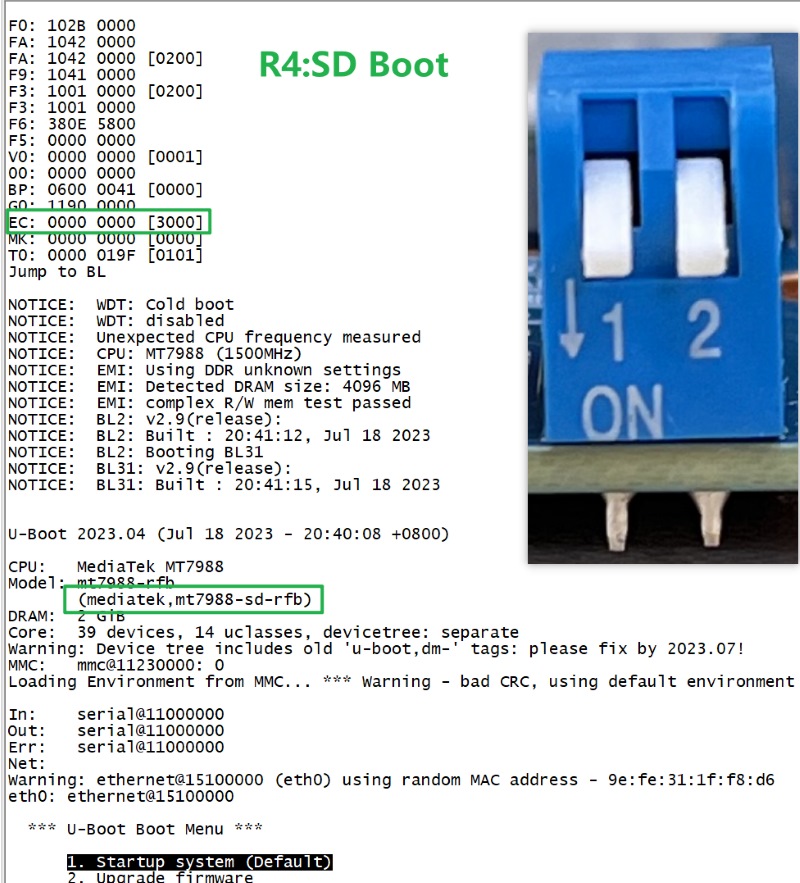
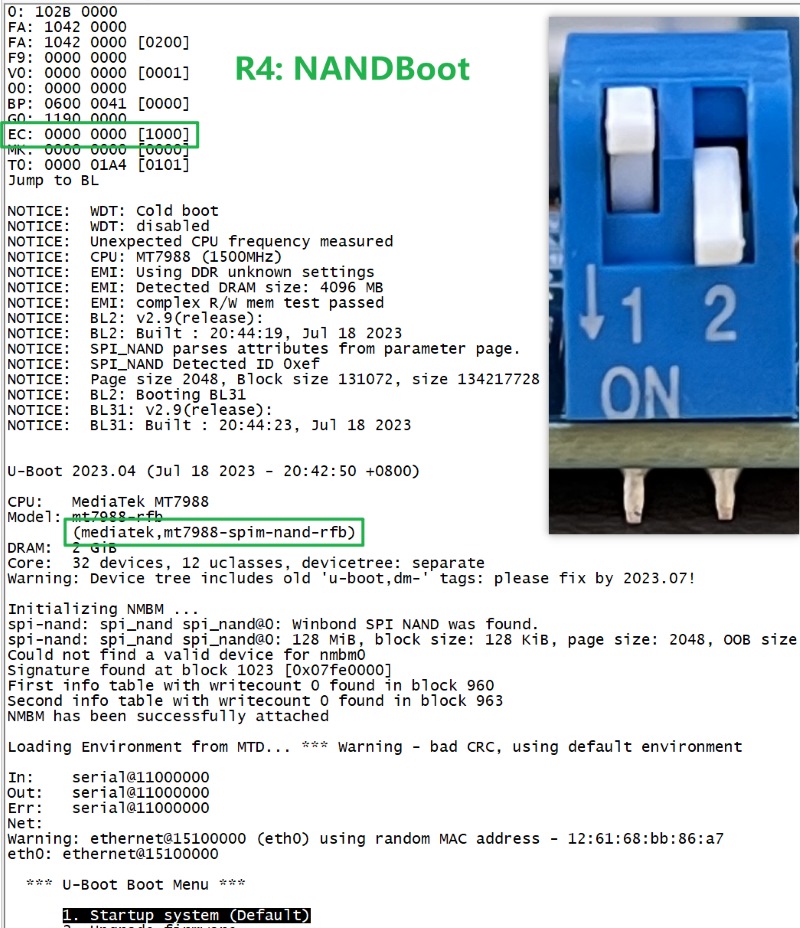
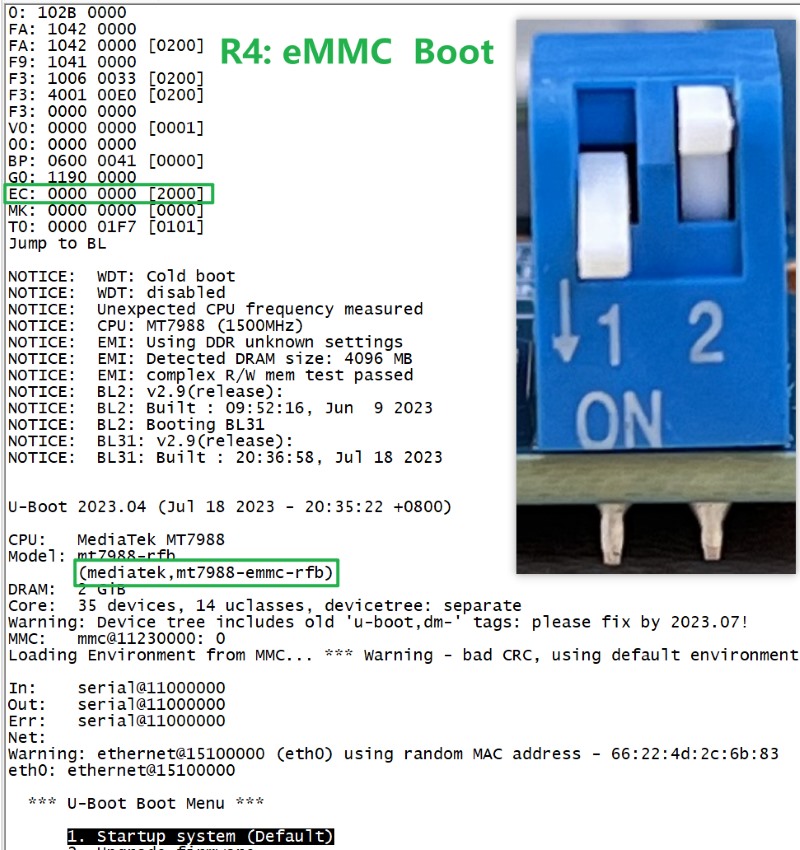
¶ Check the DIP switch
Before booting, check and use the correct DIP switch.(BPI-R4 will burn img in NAND when it leaves the factory.)
-
All Jumper is "1", BPI-R4 will boot from SD card
-
SW3-A is "0" and SW3-B is "1" , BPI-R4 will boot from SPI NAND
-
SW3-A is "1" and SW3-B is "0" , BPI-R4 will boot from eMMC
¶ SD card
If you have verified that the DIP switches are correctly positioned, proceed to the following steps.
-
After powering on the board, check if the PWR light in the upper right corner of the board is on. (If not, proceed to step 5.)
-
Reseat and remove the SD card to check for poor contact.
-
If the boot failure is due to a malfunction, format the SD card and re-burn the image file. (Use MP4.1 for the image file.For burning instructions, see Getting Started.)
-
Replace the SD card and re-burn the image file to verify again.
-
Once the issue is confirmed, please contact us and provide the following information:
-
Describe the issue you are experiencing and how it occurred.
-
Photo of the board powered on (the TTL lines and DIP switches must be clearly visible).
-
Provide the serial port log file.
-
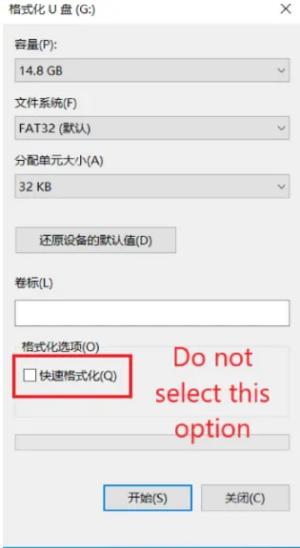
| After the burning process, there is a possibility of encountering jffs2 errors upon startup. |
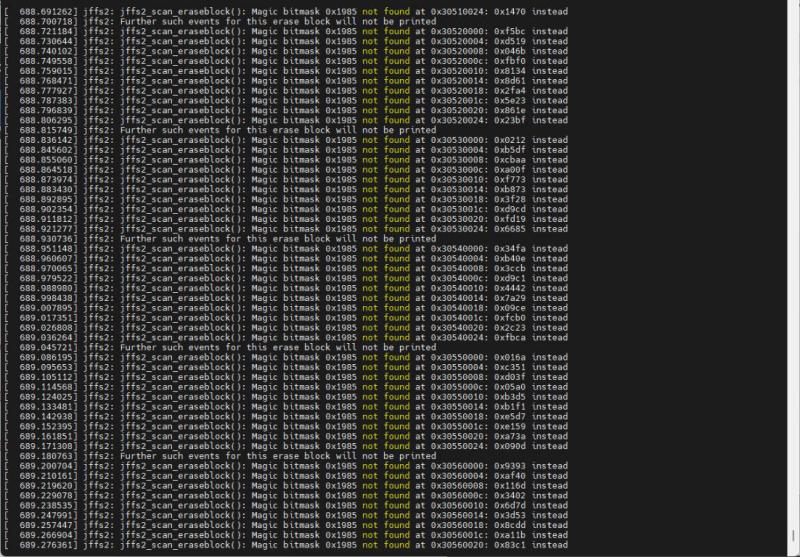
Please perform a low-level formatting on the SD card and delete all the data on it. Do not select the "Quick Format" option for the formatting process.
¶ NAND
If you have verified that the DIP switches are correctly positioned, proceed to the following steps.
-
After powering on the board, check if the PWR light in the upper right corner of the board is on.
-
If the boot failed, boot from an SD card and re-burn the image to the NAND drive. (Use MP4.1 for the image file.For burning instructions, see Getting Started.)
-
After confirming the issue, please contact us and provide the following information:
-
Describe the issue you’re experiencing and how it occurred.
-
Photo of the board powered on (the TTL lines and DIP switches must be clearly visible).
-
Provide the serial port log file.
-
¶ SD card with Ubuntu or Debian 6.1 kernel
After booting from an SD image with the Ubuntu or Debian 6.1 kernel, the image in NAND will no longer boot. If you wish to boot from NAND, you will need to re-burn the image to NAND.
For the burning method, please see Getting Started BPI-R4.
¶ eMMC
If you have verified that the DIP switches are correctly positioned, proceed to the following steps.
-
After powering on the board, check if the PWR light in the upper right corner of the board is on.
-
If the boot failed, boot from an NAND and re-burn the image to the eMMC drive. (Use MP4.1 for the image file.For burning instructions, see Getting Started.)
-
After confirming the issue, please contact us and provide the following information:
-
Describe the issue you’re experiencing and how it occurred.
-
Photo of the board powered on (the TTL lines and DIP switches must be clearly visible).
-
Provide the serial port log file.
-
¶ BE14 cannot be started
-
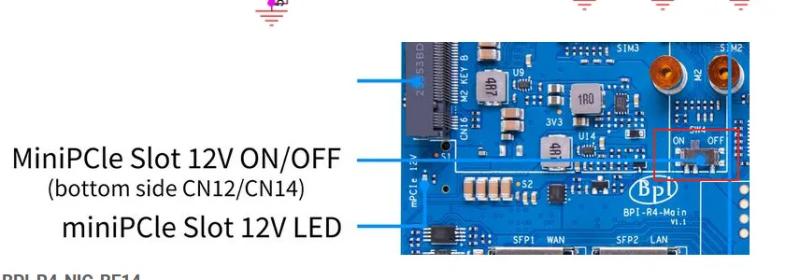
Please make sure that the switch of SW4 is set to "ON", so that R4 can supply 12V power to BE14.
-
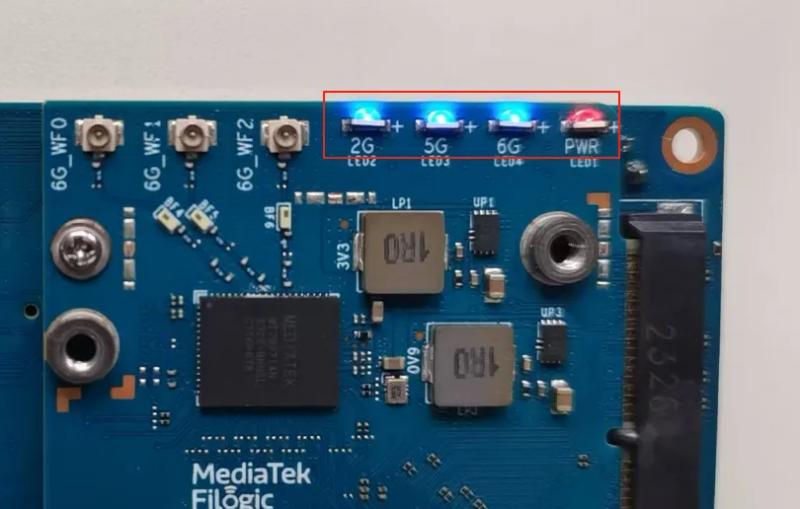
Please check the lights on BE14. The PWR light indicates the power supply (red), while the others indicate the WiFi operation (blue).
-
If the WiFi lamp is not activated, try to power off the device, remove and reinsert the BE14, and then restart it.
-
If the first three steps fail to start BE14, you can try re- burning the image.
-
If you have checked the above steps and confirmed that the problem lies with the motherboard hardware, please contact us and provide the following information: Describe how you caused this phenomenon. Photo of the board powered on (the TTL line and DIP switch should be clearly visible), and photos of the MobaXterm software. You can also take a video.
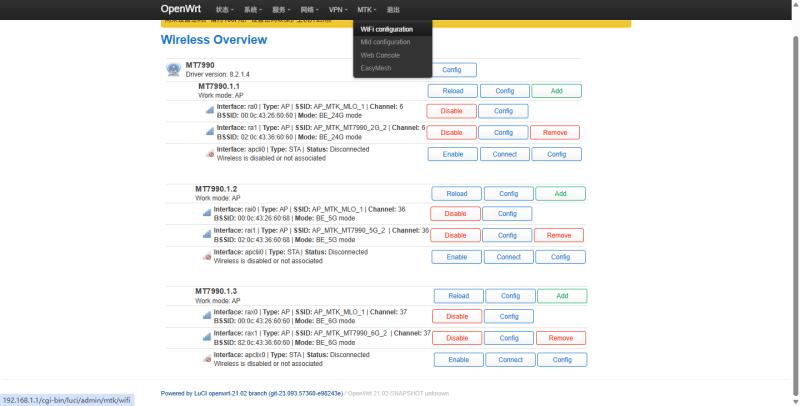
If WiFi is available, you can view the WiFi configuration on this web interface.
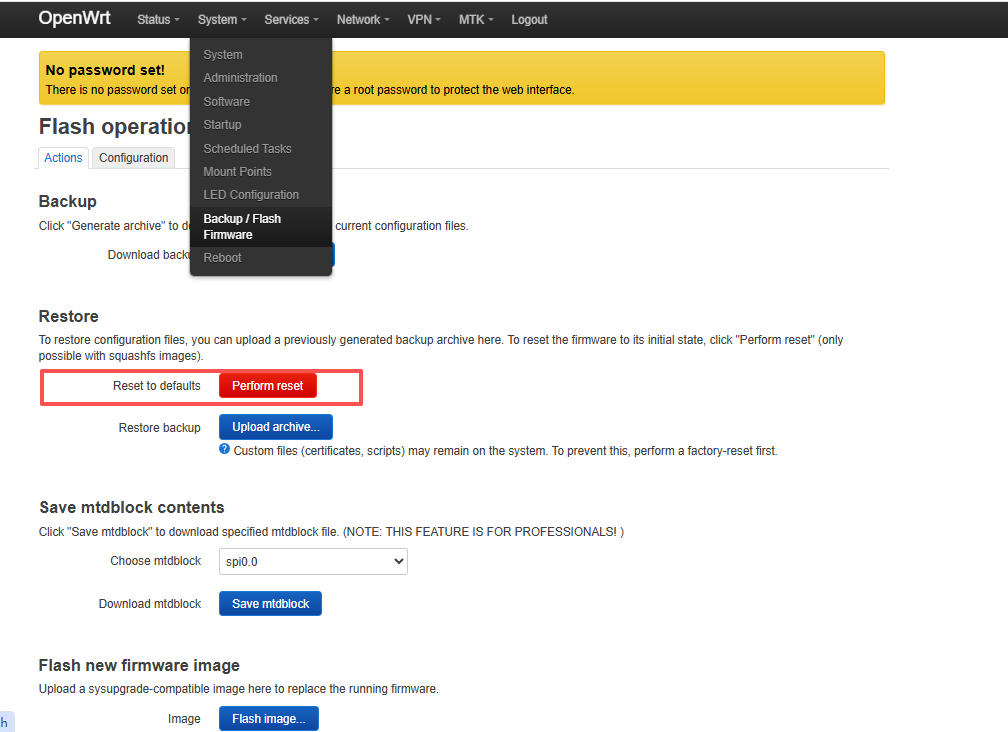
¶ Restore factory settings on OpenWrt
-
click "perform reset" on the web page.
-
Use the command
firstboot -y && reboot¶ OpenWRT mainline image txpower low
Customers who purchased our BPI-R4+BE14 and are using the OpenWRT mainline image have found that their 2.4G and 5G WiFi transmit power is only 6dBm and 7dBm respectively. Here is the solution:
-
Prepare a Linux host.
-
Download the source code for the corresponding mainline branch.
-
Place the patch file in the
package/kernel/mt76/patches/directory. -
Execute the following command:
make clean make -
Burn the compiled image to SD/NAND/eMMC and boot.
-
Update and install the web page.
opkg update opkg install luci /etc/init.d/uhttpd enable /etc/init.d/uhttpd start -
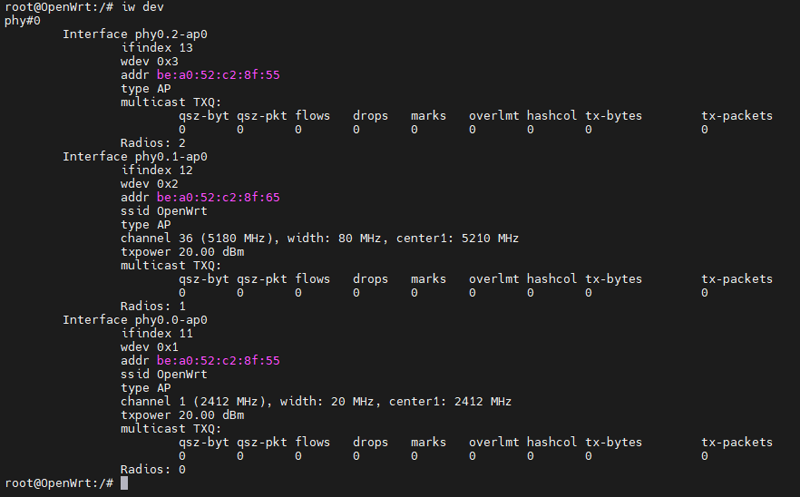
Go to the web page and turn on WiFi. Then use the
iw devcommand to see that the WiFi speed is now 20dBm.